
So, you want heat…
When we ordered our American Tug 395, we were aware that the boat comes from the factory with two different versions of climate control. “West coast boats” are delivered with a single small air conditioning unit that includes reverse cycle heating capability, plus a separate Webasto diesel hot air furnace. “East coast boats” come with three air conditioning units that have reverse cycle heat, but no diesel heating system. Both boats also include a pair of King electric heating units. As we intend to take our boat south, the additional air conditioning capacity of the East Coast boats was something we need. However, we also cruise in some pretty cold and damp conditions, so heat is important to us.
There is nothing wrong with reverse cycle heating or electric heat if you are plugged in or running your generator. However, the diesel furnace operates on 12 volt and thus may run on battery power. Because of the way we cruise, we wanted heat that would not require the generator or shore power, so we knew that a diesel-fueled system was in the cards. Here is the rub: the hot air furnace type normally installed on the “West coast boats” lacks a couple of features we also desired for our boat. Namely, zone control and the ability to heat water, which are niceties a 12-volt diesel hydronic system brings to the table.
The decision was made to install a hydronic heating system post purchase/delivery, and who better to install it than…me! The truth is, I love these projects. I get to learn both something about the boat itself while crawling in places most owners never even know exist, and I learn about another technology, in this case the hydronic heat.
Normally I would have installed our boat’s electronics too, but as we elected to take the delivery at the factory on the west coast do some exploring of the Pacific Northwest in the form of a shakedown cruise, we had limited time so we elected to have the electronics installed before we took delivery.
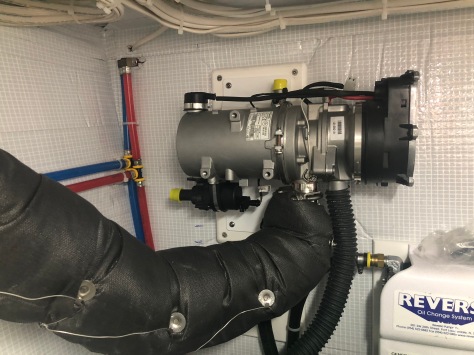
Tony Wyatt of Marine Systems Northwest was hired to advise and install the Garmin gear aboard the boat, and as we got to know and trust Tony we began discussing the virtues of various heating systems and brands. At Tony’s suggestion we elected to purchase a Webasto ThermoPro 90 system sold by Sure Marine. Tony warned me that this would be a time consuming installation, and although I listened to and believed him, I woefully underestimated the time that the project would consume.
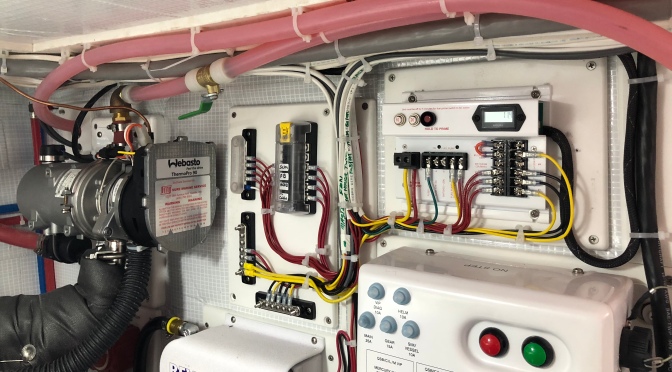
In a nutshell, there are a number of component parts to an hydronic heating system that must not only be installed, but they must be located within critical distances from each other, at correct elevations, in places that need heat, and that can be connected electrically and with plumbing.
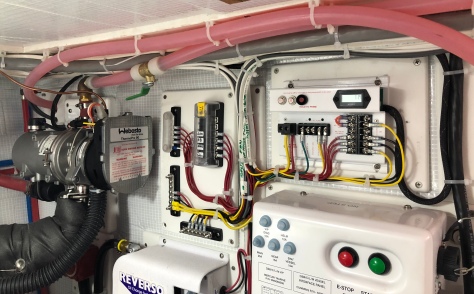
First there is the boiler, or the device where diesel fuel is mixed with air and burned to heat water. It has an exhaust system that must meet critical design standards, a fuel system that requires special consideration, and a control board or box to run the various pieces and parts. The boiler (and in fact all plumbed components) must be lower than the expansion tank, must be accessible for service, has plumbing coming and going, and is loud. There is air intake to think about too.
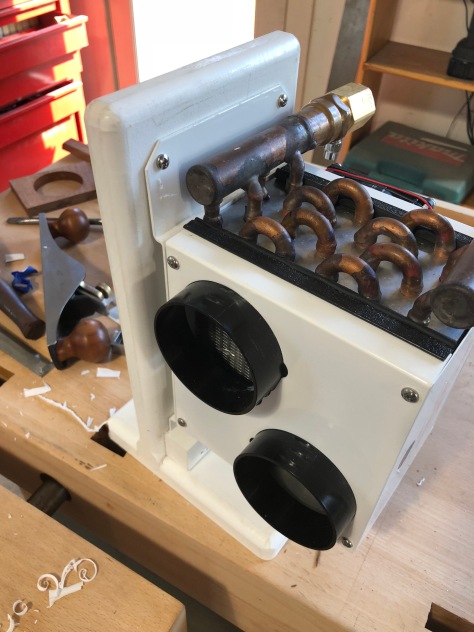
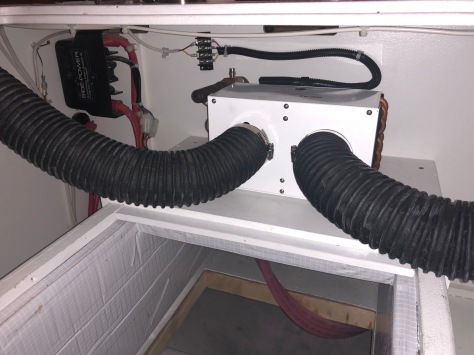
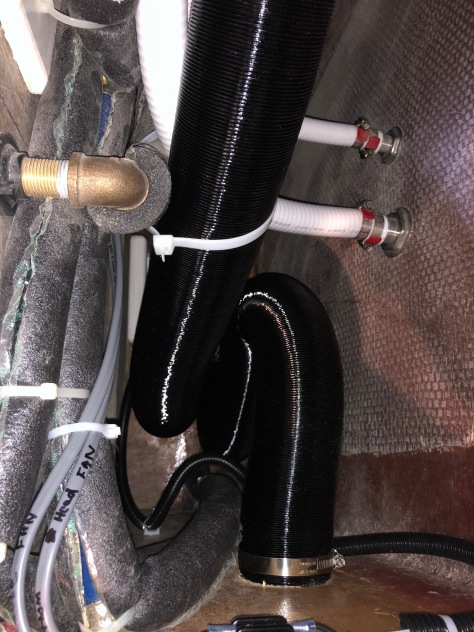
Then there are the heaters themselves. Essentially little radiators built by the Real Company, they are just like the heater core in your automobile. Each heater has a pair of fans that blow air across the radiator and out a fitting to a tube that leads to a register that must be located along with its tubing. The fans need wiring and the radiators need plumbing but more on that later…
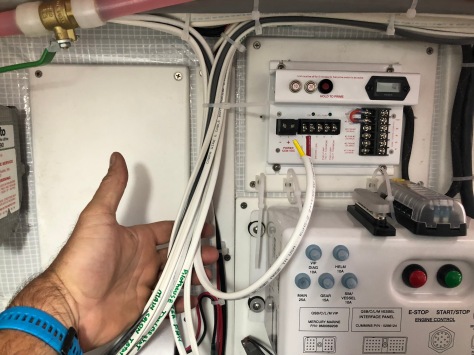
Now we need to locate thermostats for each heater. On a boat, that is an exercise in compromise. I get a kick out of reading the installation manuals: “Locate in a place where there is no draft, no exposure to sunshine, and at a height of five feet…,” etc. Once located, they have to be wired back to the heater.
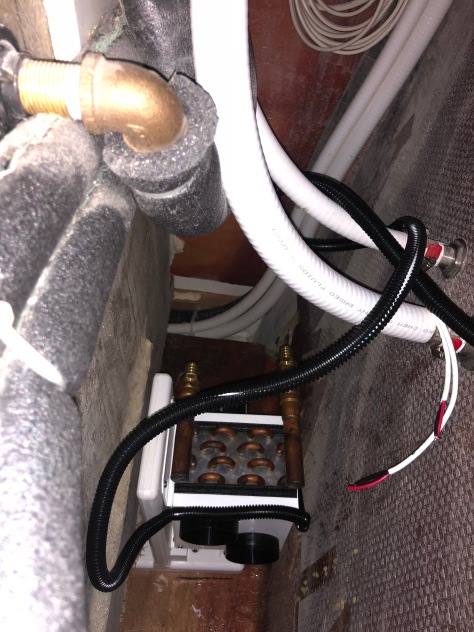
Now lets talk about plumbing. Most hydronic heaters on boats are plumbed with industrial duty 3/4” heater hose. Hose is easy to install and repair, it has good flow characteristics, and the clamps used to secure it are available at any marine store or, in a pinch, at an auto parts store. It is also difficult to install in long, even runs without getting dips that are detrimental to the function of the heater. The clamps can loosen and allow coolant to leak, and hose is easy to damage.
An alternative to using heater hose is PEX tubing, specifically HePEX tubing that is designed for heating systems. It is less expensive than the hose. The fittings are less expensive but it requires special tools to join. Once properly joined, however, it is joined! No leaking clamps with PEX. It is much easier to make long runs with PEX without dips and it is easier to secure in place. There are difficulties with using the material, however. It is more difficult to make a bend with PEX than with hose, and the 90 degree fittings are more restrictive than hose. Finally there is the need for a specific tool for making connections. Options are complicated, but essentially you have to choose to use a hand tool or a rather expensive power tool to make PEX connections.
I chose to use PEX instead of hose, and purchased the pricey power tool, which was basically the only option for getting good connections in this particular installation.
Now then, to recap, you simply mount the boiler, make an exhaust system and wrap it with a thermo blanket, mount heaters, locate registers, drill holes for everything, wire fans, locate thermostats, wire thermostats, plumb in heaters, expansion tank, boiler, summer valve, and hot water heater, install the control board, supply power, design and install a fuel system, and complete the wiring. Fill the system with freeze protected coolant, bleed air from coolant, bleed the fuel system and fire it up.
If you have read everything 10 times, asked 2000 questions (the correct questions, no less) and taken your time, everything will work just fine. In my case the project consumed more than three weeks of full-time work. I took pains to make everything as neat and orderly as I possibly could. The system did in fact simply turn on and run perfectly. We now have hot water without running a generator or engine, and without being plugged in. We have three distinct heat zones and I could not be happier.
Like any DIY project, I did not work efficiently. I had no need for efficiency. Instead, I wanted as much perfection as I could possibly achieve. I appear to have succeeded.
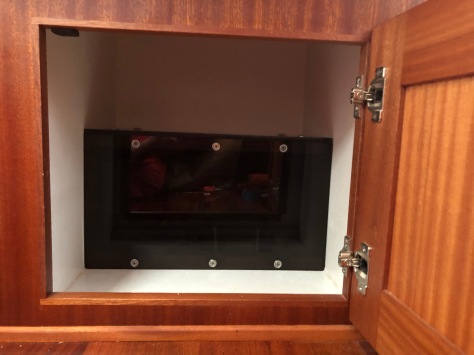
Project images below:


Thank you for this post!! A great and fun read for sure. The perfectionist in me says this type of project is out of my wheelhouse, but I love reading about and seeing the pictures. Nice work!
LikeLiked by 3 people
Very technical. I got a handed to you Bruce great job.
You probably need it at the block today. Let us know how it works.
LikeLiked by 2 people
How wonderful, nothing better than the soft and agreeable warmth of Webasto. Impressive work. Bravo !!!
LikeLiked by 2 people
I really do not know why but all of the “barhounds’ went CRAZY about this project. Go figure.
LikeLiked by 2 people
Bruce, after reading this I think you have way too much time on your hands. I know you love these projects, but it is time to go cruising and think back how far you have come these last few years. Remember the simple days? Hope this all works out for you guys. Dean and Kathy
LikeLiked by 1 person
Bruce loves the projects as much as we both love the cruising, so all is good! (He just likes the projects a little more than I do, but I do love the benefits!)
LikeLike
What type of air duct are you using in your photo of the head pilot house radiator (fifth picture from the top)? The hose appears to be semirigid and flexible.
LikeLike
That is a hose typically used in forced hot air systems. Both Espar and Webasto brands have a similar hose. I used it here simply because it was available locally.
I believe it has less resistance to airflow too, something important when you consider the long hose runs typically associated with a forced hot air furnace.
LikeLike